Getting Started
Frequently Asked Questions
Once you have a Fisdap activation code, creating an account is easy.
- Go to the Fisdap home page, www.fisdap.net.
- Click Create an Account.
- Type or paste in your activation code (which you should have received from your instructor) and click Continue.
- Depending on whether your school has prepaid for your account or not, you may need to enter your billing information, then click Place Order. On the receipt page, click Create Your Account. If your school has already paid for your account, you will automatically be taken to the next step.
- Enter your profile information, and choose a Fisdap username and password, then click Save & Continue.
- Read and accept the User Agreement and click Continue.
- You’re all done! Click Continue to MyFisdap to log in and access your new account.
An activation code is a series of letters and numbers that identifies your school and indicates which products your account should have access to, depending on how your school uses Fisdap. When you set up a new account using your activation code, you will automatically belong to the correct school and have access to the correct products. If your school requires you to set up a Fisdap account and you have not received an activation code, you should get in touch with your instructor.
There are two types of activation codes: prepaid codes and unpaid codes.
Prepaid activation codes
Prepaid codes have already been purchased by your program, and are formatted like this: 22-746c14377b9d9-135f. They use capital letters A through F and numbers 0 through 9. (Hint: if your prepaid activation code has a 0, it’s a zero, not the letter O.)
Unpaid activation codes
Unpaid codes require payment from you, the student, and are formatted like this: JS-192B. The first part of the code identifies your school, and the last part of the code indicates which Fisdap products you need. The dash is also important, so be sure to type that in too. (Another tip: all the letters should be capitalized.)
No matter which type of code you have, you will enter it in the same place to create your account. Check out the Create Account instructions above if you need help setting up your account.
Fisdap Student Tutorial: Activating a Code
Follow These Steps to Create Your Jones & Bartlett Learning Public Safety Group Account and Link to Fisdap
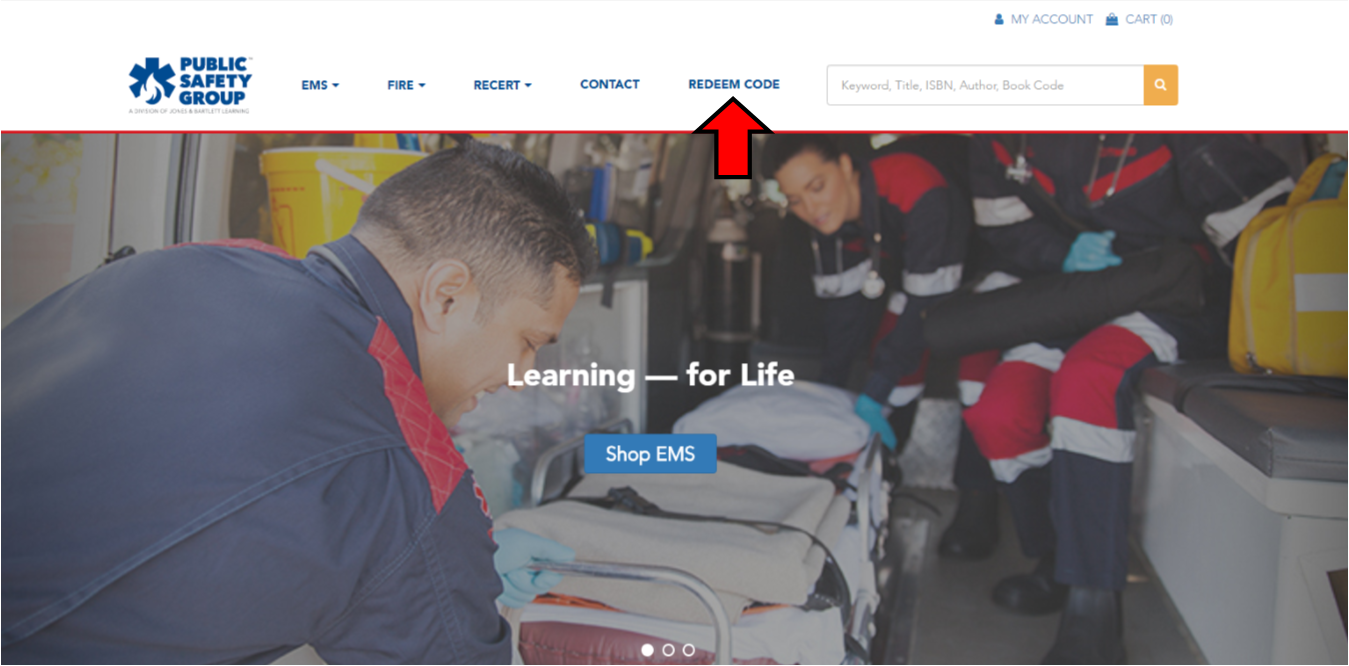
- Visit www.psglearning.com and click Redeem Code from the options at the top of the page.
- Agree to the Terms and Conditions.
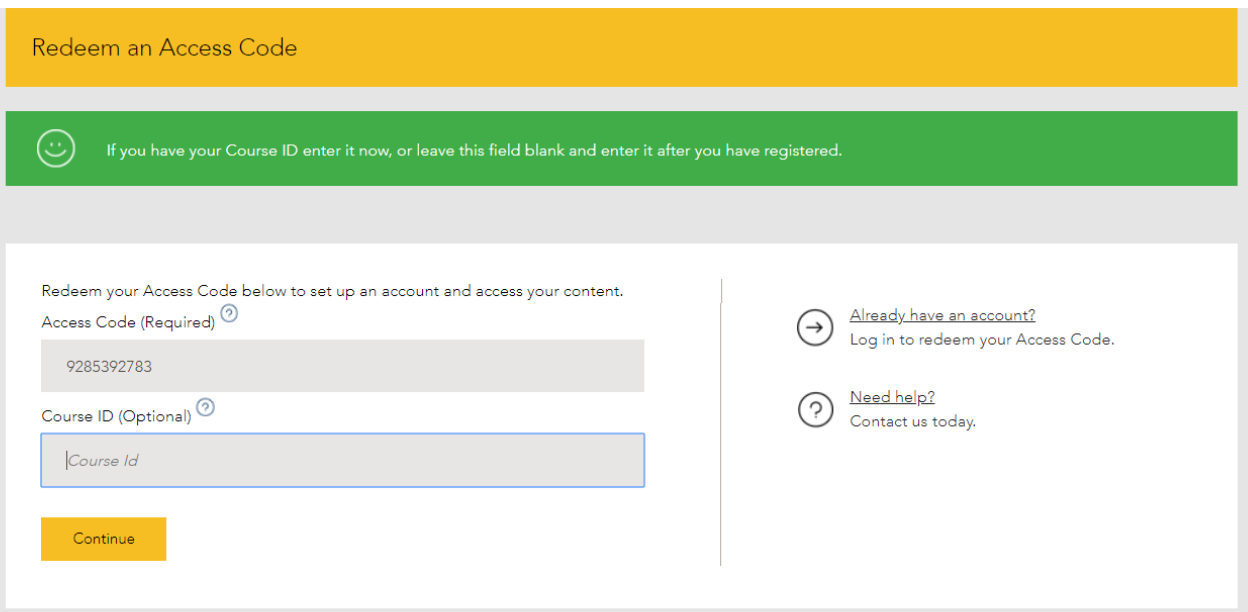
- Enter the Navigate 2 Access Code included in your Jones & Bartlett Learning Public Safety Group textbook.
- After you enter the code, you will be prompted to enter a Course ID. Enter the Navigate 2 Course ID and click Continue.
- Once you have confirmed that the product is correct, click "Confirm with existing account" OR "Confirm and create new account." (If you have an existing account, enter your login information and proceed to step 7.)
- To create a new account, enter the required information, and click Create Account.
- Once you have logged in, you will see the Navigate 2 product with your Course ID. Click the product and then click Launch.
- Click the Fisdap button in the tabs at the top of the page.
- Select Scheduler or Skills Tracker.
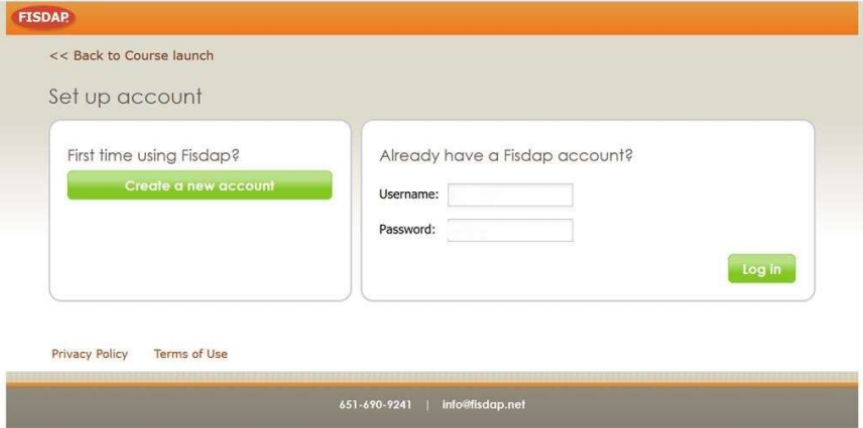
- On the interstitial page, click "Create a new account," or enter your existing Fisdap login credentials to link it to your Jones & Bartlett Learning Public Safety Group account.
- Once you are logged in, the Fisdap button in Navigate 2 will automatically connect to your Fisdap account. If you created a new account, you will be able to log directly into Fisdap using the same login credentials as your Jones & Bartlett Learning Public Safety Group account!
Follow These Steps to Add the Navigate Update Package to Your Fisdap Account:
- Visit www2.jblearning.com/my-account/login and enter your credentials to login to your Jones & Bartlett Learning Public Safety Group account.
- Click Redeem Code in the upper-right corner of the products page.
- Agree to the Terms and Conditions.
- Enter the Access Code for the Fisdap Navigate 2 Update Package.
- Enter the Course ID provided by your instructor for the Fisdap Navigate Update Package and click Continue.
- You will be brought back to the products page, where you can choose the Fisdap Navigate Update Package, and click Launch.
- This will load your Fisdap account, adding the testing products.
- Once you have launched the update package from your Jones & Bartlett Learning Public Safety Group account, you can access it through Fisdap directly.
These instructions only apply to students accessing the Nancy Caroline’s Emergency Care in the Streets course from your school’s Learning Management System (LMS). Registration steps should be performed in the sequence below to secure access to the course on your LMS and FISDAP separately:
- Begin by following these registration steps using your Nancy Caroline’s Emergency Care in the Streets access code in your LMS.
- Using the same login credentials during registration to the course in your LMS, you may now redeem your separate FISDAP access code and enroll in your FISDAP Internship program by following these instructions. If you do not have a FISDAP access code, please inquire with your instructor.